Are you in search of the latest gadgets to elevate your tech game? Look no further than Ukamart! Ukamart has it in stock and ready for pickup
Whether you’re hunting for sleek laptops, cutting-edge smartphones, or must-have accessories, we’ve got you covered.
At Ukamart, we take pride in offering a vast array of tech products to cater to your every need and the best part? They’re all in stock and ready for pickup today!
That’s why we offer competitive pricing on all our products, making it easier than ever to upgrade your tech arsenal without breaking the bank.Customer Satisfaction
At Ukamart, customer satisfaction is our top priority.
From the moment you step into our store to the pickup of your purchase, we strive to deliver a seamless shopping experience that exceeds your expectations.
See a video on our YouTube channel
Why Buy from Us?
In conclusion, Ukamart stands out as your ultimate destination for all things tech.
With our wide selection, convenient pickup options, and commitment to customer satisfaction, we’re confident that you’ll find exactly what you’re looking for – and more – at our store.
So why wait? Experience the Ukamart difference today and take your tech game to new heights.
Whether you’re a gadget enthusiast, a professional on the go, or simply in need of an upgrade, we’ve got everything you need to stay connected and productive.
Visit us at Ukamart.com and discover the future of tech – available today, just for you!
In an age where technology permeates every aspect of our lives, the specter of cyber threats looms larger than ever.
Among these threats, ransomware stands out as one of the most insidious and pervasive. But what exactly is ransomware, and why should you care?
Let’s delve into this pressing issue and explore why safeguarding your devices has never been more critical to help reduce Ransomware Risk.
Understanding Ransomware
Ransomware is malicious software designed to infiltrate and encrypt files on a victim’s device, rendering them inaccessible.
Once infected, users receive a ransom demand, typically in the form of cryptocurrency, in exchange for a decryption key.
The consequences of falling victim to ransomware can be devastating, ranging from financial loss to compromised personal and professional data.
The Rising Threat Landscape
With the proliferation of connected devices and the increasing sophistication of cybercriminals, ransomware attacks have become more frequent and sophisticated.
No one is immune, from individuals to large corporations, making it imperative for everyone to stay vigilant and take proactive measures to protect their digital assets.
Why Prevention Matters
Preventing Ransomware Risk requires a multi-faceted approach, including robust cybersecurity measures, regular software updates, and user education.
Failure to do so can have dire consequences, both in terms of financial loss and damage to reputation.
Introducing Ukamart: Your Trusted Partner in Device Security
At Ukamart, we understand the importance of safeguarding your digital life against ransomware and other cyber threats.
As a leading provider of laptops, phones, and accessories, we prioritize not only delivering top-notch products but also ensuring the security and peace of mind of our customers.
By choosing Ukamart, you’re not just purchasing a device; you’re investing in comprehensive protection against ransomware and other cybersecurity risks.
Our products come equipped with the latest security features and undergo rigorous testing to ensure they meet the highest standards of reliability and resilience.
Conclusion: Protect Your Digital World with Ukamart
In a world fraught with digital dangers, protecting your devices against ransomware is paramount.
Don’t leave your valuable data and personal information vulnerable to exploitation. Choose Ukamart for all your device needs and rest easy knowing that you’re in safe hands.
Together, let’s build a safer, more secure digital future. Shop with confidence at Ukamart today. Your security is our priority.
Twenty-seven percent of malware incidents reported in 2020 can be attributed to ransomware.
Ransomware — cyber extortion that occurs when malicious software infiltrates computer systems and encrypts data,
holding it hostage until the victim pays a ransom — can have a bigger impact on an organization than a data breach.
In the short term, ransomware can cost companies millions of dollars, and a potentially even greater loss over the long term, impacting reputation and reliability.
From top healthcare providers and retailers in the U.S. to insurance providers in the Middle East, ransomware attackers are proving to be a continuing cybersecurity threat.
In some recent cases of ransomware attacks, the victim organizations have paid huge amounts to the attackers, which can be one of the reasons these attacks are getting more popular.
Whether you’re a small business owner or a tech-savvy individual, here are some essential strategies to safeguard your data and devices from ransomware threats.
Conduct frequent exercises and drills to ensure that systems are always able to detect ransomware attacks.
Build regular testing of incident response scenarios into the ransomware response plan.
Test, test, and retest at regular intervals to check for vulnerabilities, noncompliant systems, and misconfiguration.
Ensure that incident response processes are not reliant on IT systems that may be affected by ransomware attacks or unavailable in case of a serious incident.
Restrict permissions and deny unauthorized access to devices. Remove local administrator rights from end-users and block application installation by standard users,
replacing this with a centrally managed software distribution facility.
Research government and regional authorities that have provided guidelines on how organizations can fortify their network infrastructure against ransomware.
CISOs and security leaders can use guidelines such as these to create a basic training program for all staff in the organization.
However, ransomware preparedness training needs to be customized to the organization for better results.
In conclusion, defending against ransomware requires a multi-layered approach encompassing technological solutions, employee awareness, and proactive measures.
By implementing the strategies outlined above, you can significantly reduce the risk of falling victim to ransomware and protect your valuable data and devices.
Ukamart
At Ukamart, we understand the importance of cybersecurity in today’s interconnected world.
That’s why we offer a wide range of laptops, phones, and accessories equipped with the latest security features to help you stay protected against ransomware and other cyber threats.
With our commitment to quality and reliability, you can trust Ukamart to provide you with the tools you need to safeguard your digital assets.
Choose Ukamart for peace of mind and unparalleled security.
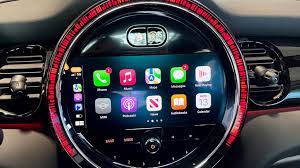
With CarPlay, it becomes much easier to use your iPhone in the car hands-free to access the features and content you want while you drive.
When Apple first unveiled CarPlay in 2013, it focused a lot of the feature set on what its Siri voice assistant could do while you drive. Not that it was the only purpose, as apps were going to play a big role, which they certainly do looking at the platform now. What started largely as an Apple-only affair has grown into one of the deepest in-car infotainment experiences around.
CarPlay currently works with any iPhone going back to the iPhone 5. That’s a long list of compatibility going back a decade, so if you have one of Apple’s phones, chances are good it will run this platform. Over 600 vehicles work with CarPlay, though a vast majority are from the last five years. If you have a car that doesn’t offer CarPlay, you have other options to get it in there, which I’ll cover here.
Setup and organize your CarPlay
For CarPlay to do anything, your iPhone needs a data connection. That could be from your phone’s own SIM card, or a Wi-Fi hotspot close enough for the car to access. In most cases, you will need to plug the iPhone into the vehicle’s USB port to launch CarPlay. Since iPhones use Lightning ports, it would have to be a compatible cable, which is easy to find.
Some vehicles may have USB-C ports only, forcing you to use a USB-C-to-Lightning cable or adapter. Otherwise, a simple USB-A-to-Lightning cable would work fine. Others may offer CarPlay wirelessly, meaning you won’t have to plug in to launch it at all. Wireless CarPlay does require a Bluetooth connection between the phone and vehicle and then uses Wi-Fi Direct to establish the ad hoc setup between them.
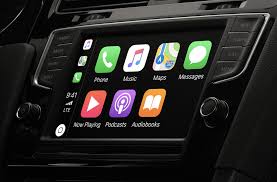
CarPlay is a projection platform, so it’s not running on your car stereo, it’s merely taking the signal from your phone and pushing it to the infotainment screen on the dash. There is no app to download, as CarPlay is part of iOS, and as such, runs automatically on any vehicle capable of handling it. When you first do it, the vehicle’s system will ask you to confirm that you want to use it. It only takes seconds and you’ll be up and running.
Customize the app launcher
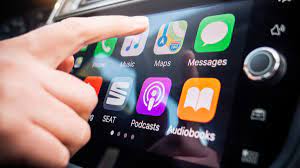
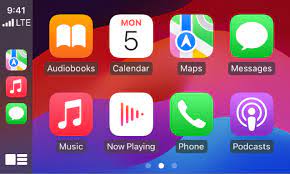
The platform will take whatever compatible apps you have and arrange them in a grid-like layout reminiscent of the iPhone. The order is a bit random, other than how Apple’s own core apps (Phone, Messages, Music, Maps, Now Playing) dominate the main page. You can rearrange, as well as remove, apps however you like.
On your iPhone, go to Settings -> General -> (Your car) -> Customize. Here, you can alter how the apps appear when you drag and drop them in the spots you want. Tap the red icons for the ones you want to remove. Next time you run CarPlay, they’ll appear however you set them.
Apps, calling, messaging and more
There are a lot of apps that work with CarPlay now. The only thing is you need to download and install it on your iPhone first. If you have an app on your phone that doesn’t show up on your CarPlay screen, then it probably doesn’t work with the platform yet.
Many popular apps are ready to go if you have them. For music, you have Apple Music, Spotify, Tidal, YouTube Music, Amazon Music, Deezer, SiriusXM, iHeart, and Anghami, among others. Notably missing is Soundcloud. Listen to audiobooks all you want from Audible, Audiobooks.com, and AudiobooksNow. Plenty of podcast apps are compatible, including Overcast, Downcast, Pocket Casts, and Stitcher are there. The NHL, NBA and MLB all have a way to broadcast games, albeit through radio feeds only.
Apple Maps is always there, but you’re probably better off using Google Maps or Waze for directions to wherever you want to go. iMessage works as it always does through CarPlay. You can’t type any messages unless you grab your phone (which you shouldn’t do), but you can send or respond to messages by voice. Other messaging apps are in there, like WhatsApp, Signal, and Telegram, among others. You may notice Facebook Messenger is missing, and that’s by design, as the app has never been part of the platform.
Calls are easy. You can simply tell Siri to call anyone in your contact list or tap the screen to accept an incoming call. It also works with other calling apps, like FaceTime, Viber, and Skype to communicate.
Siri is easy enough to wake up. You can either press the voice button on your steering wheel (if you have it), or just say, “Hey Siri” and you’ll hear the familiar tone. A small animation appears at the bottom of the screen, much like it does on an iPhone.
Apple has done well to expand on what Siri can do with CarPlay. At the start, it was very basic, often limited to Apple’s apps. Now, you can tell Siri what to play on Spotify, or where you want to go with Google Maps or Waze. It is important you state the name of the app you want to access. For instance, “play (playlist) on Spotify,” would do the trick.
You can also ask Siri for suggestions if you’re looking for gas, an electric vehicle charging station, coffee, restaurants, etc. If you already use Siri on your iPhone, you will find some similarities in how it works in the car. Set reminders when you need them, or even a calendar entry once something comes up. Ask it to read out notifications, as well as tell you a short story or joke.
How apps integrate with CarPlay
There are certain things you can do to integrate apps with CarPlay even more. As an example, if you already start a search and turn-by-turn directions for a destination in one of the aforementioned mapping apps, it carries on once you connect to CarPlay. Music, podcast, or audiobook content will also immediately continue playing when you connect.
When you are listening to music, you can like a track to save it, or even create a radio station based on that song. This works with Apple Music, but you can also do it with others, like Spotify and Tidal.
You may not see your smart home apps appear on CarPlay, but that doesn’t mean Siri can’t communicate with them. Control your smart lights and other devices by voicing the commands yourself. If it’s for security cameras, you wouldn’t be able to see anything onscreen, though you could get notifications on your phone while CarPlay is running.
While I’m personally not a fan of Apple Maps, it does have one useful feature with parking. Go to Settings -> Maps -> Show Parked Location to toggle it on. What this does is mark where you last parked, which can be super useful if you’re in a crowded space.
Driving safely with your iPhone
Provinces have rules about driving with your phone, and many of them mandate that you go hands-free in those circumstances. Follow the laws where you live to avoid any distracted driving tickets and to keep others safe on the road. CarPlay is supposed to make it so much easier to do that, and when you learn it, you recognize that simplicity.
Check out the latest iPhones capable of running CarPlay in your car. If you need a way to mount your phone, you’ve got options. And if your car doesn’t have CarPlay at all, aftermarket head units could get you there.
Visit Ukamart today and discover how our products can enhance your digital lifestyle, both on the road and at home. Empower your journey with Ukamart – your trusted partner in technology.
No matter if you have an iPhone or Android phone, chances are it is full of photos and other information that you don’t want to lose. After all, it’s a terrible feeling to not only lose a smartphone but to also lose all the data stored on it. Back it up, especially when it’s personal and priceless.
The good news is that it’s not difficult to do that regularly, regardless of which phone you’re using. Generally speaking, smartphone manufacturers and mobile operating system developers have backup processes in place that simplify things.
The importance of backing up can’t be understated. Imagine having a camera on vacation and losing the memory card. All those great images and memories are gone. Multiply that several times over and include your messaging history, contacts, music, video, apps, and personal data (passwords, notes, etc.) and you have a much bigger issue.
Here, I’ll go through each mobile platform and the backup options:
Back up on macOS via Finder
When Apple released macOS Catalina, it also changed the backup process for iPhones. Instead of doing it through iTunes, you could now do it directly through the Finder on your Mac. Plug your iPhone into your Mac, and you will see it appear under “Locations” in the side menu of any open window. Click on it and an interface appears in the window showing you all the basics.
Among the options will be to “Back Up Now”. This is essentially a backup maintaining the status quo at the time you backed up. If you were to lose your phone or need to restore to a new one, you could load the backup file onto the new device and place everything exactly where it was. This is also really helpful if you run into a situation where you need to factory reset your iPhone and want to restore everything afterward.
Note that iOS now allows you to migrate all data from one iPhone to another directly without having to use a Mac or Windows PC to do so. That’s convenient when upgrading to a new iPhone, but when you want to back up to a computer, however, this is one of the methods to do so.
Back up on macOS via iTunes
From the beginning, Apple always offered iTunes as a one-stop shop for syncing and backing up an iPhone. When it added iCloud, there was another option that could also help. Doing it through the Finder came later. If your Mac is running macOS Mojave or earlier, you can use iTunes to back up your iPhone’s data entirely to your computer.
I always found it super convenient to keep a weekly backup that I could use to overwrite the previous one. Not to mention avoiding having to re-download everything. All you need to do is plug in your iPhone to a Mac or Windows PC, launch iTunes, and select Backups>Manually Backup and Restore>Back Up Now to make it happen.
If you have an older backup already stored on the computer and want to save space, you can delete the older one by going to the menu bar clicking on Manage Backups, and deleting it from there.
Back up on iOS via iCloud
iCloud is always good at backing up the basics, like contacts, mail, notes, calendars, reminders, and photos. You do get the first 5GB of cloud storage free, but you will have to pay to increase that. The storage options range from 50GB, 200GB and 2TB.
What’s good about iCloud is that it works for you in the background. When entering a Wi-Fi network, it can pull in any new photos, videos, and apps you added to your phone. That automatic upload is like an insurance policy for your images. You just have to make sure you have enough storage to keep it all. To enable that, go to Settings>[your name]>iCloud>iCloud Backup, then turn on iCloud Backup.
Beyond that, iCloud will back up app data, device settings, HomeKit configurations, all your messaging history (text and iMessage), iTunes purchase history, and even voicemail.
Back up on Android
WithAndroid, things are considerably clearer than they used to be. Having a Google account is important to initiate any backup process. It’s pretty basic, so will cover things like contacts, calendars, apps, and media purchased from Google Music.
Previously, Google didn’t include app data, but that’s no longer the case. Preferences, settings, and saved games can transfer over, but there is a catch. Much of that is left up to app developers, so a certain app or game might save more than the other does. One way to find out would be to go to Settings>Backup>App data. The path to get there may slightly differ, depending on the Android device you’re using, so keep that in mind.
You do have the option to restore from a previously-owned Android phone or tablet, which automatically re-downloads whatever apps were stored there to your new device. Except it won’t bring back your messaging history.
For that, it’s best to use something that can back them up. Pulse SMS is a good option because it’s cloud-based and easy to customize. Except for Google’s Pixel phones (albeit limited to 25MB worth of messages), Android phones don’t back up message history.
Photos and video are relatively easy to deal with through Google Photos. Everyone you take automatically backs up to the cloud-based app, even if you’ve shot with multiple handsets. I’ve relied on it a lot for my photography and it’s worked very well throughout.
Android via Google Drive
To back up a phone entirely, similar to how Apple does it with the iPhone, Google Drive could help. At 15GB to start for free, it may be enough for devices with smaller storage, but you probably need more. For that, you will have to buy extra storage. Note, also, that any video shot in 2K or 4K will save as a 1080p file. If you want to retain the higher resolution, it will count against your Google Drive limit.
Some things won’t require backup. For example, if you subscribe to streaming services, your playlists and preferences are saved in the cloud. Providers, like Google Play Music, Spotify, Netflix, etc. will retain your settings and preferences. Re-download the apps and login, and they will be there.
Again, Google Drive won’t back up all messages. You will need to use something like Pulse SMS or Signal to do that. Either way, it’s a good idea to download the Google Drive app as well.
To recap, if you want to make sure you back up settings and apps, you can do so through the settings on your phone. The pathway may differ a little depending on the phone you have. For instance, on a Samsung phone, it’s Settings>Accounts and Backup>Back up data (Samsung Cloud or Google Drive). On a Google Pixel device, go to Settings>System>Backup. On a OnePlus device, go to Settings>System settings>Back up and reset>Back up my data.
For Google Photos resolution changes, open up the Google Photos app. Go to the menu, tap Settings>Backup and sync>Upload size, and choose the option you want. Either one will count against your Google Drive storage space.
Android via third-party app
There is no shortage of apps on the Google Play store offering various backup solutions. It’s hard to recommend one over all others, but I will suggest Super Backup & Restore as one option to start with. You can pick and choose what to back up, and there is a free version to trial first, as you will have to pay for the pro version. My Backup Pro works similarly.
Other options
Phones that include memory card slots may be one way to back up certain files. If you’ve been using one to expand on your device’s internal storage, look into that.
For something, a little more physical and substantial, you could also use an external storage drive. It’s not as easy as plugging it directly into the phone, but you can plug it into a computer and when doing a backup, choose the drive instead.
You could also technically use any cloud-based service as a backup solution, albeit with some limitations. It’s not hard to amass gigabytes of data on a smartphone these days, and cloud services don’t usually offer a commensurate amount for free. If you’re willing to pay a little more, you can make use of them under specific circumstances.
It’s also possible to manually upload photos or documents to a cloud service, like Dropbox, whenever you like, directly from your phone. That can be a great way to ensure you have photos safely tucked away while at an event or on vacation. If you are looking for ways to back up your photos and videos, you can find those details here. I recommend you do all these things over Wi-Fi so you don’t use too much of your data bucket.
No matter what methodologies you choose to go with, the bottom line is that backing up your smartphone is a crucial part of smart maintenance.
Backing up your smartphone data is not just a precaution; it’s a necessity in our data-driven world. Whether you prefer cloud services, external storage, computer backups, or dedicated apps, there’s a backup solution that suits your needs.
At Ukamart, we understand the importance of keeping your data safe. That’s why we offer a range of high-quality laptops, phones, and accessories designed to help you stay connected and secure. Our products are equipped with the latest technology to support all your backup needs, ensuring that your data is always protected. Visit Ukamart today and explore our selection of devices that empower you to safeguard your digital life. Because at Ukamart, your data’s safety is our priority.
The iPhone is a great device, but it’s not perfect, and sometimes issues do come up, so what do you do to fix them? Take matters into your own hands.
Don’t be afraid to troubleshoot the iPhone on your own. Many of the issues that come up are the sort of things you can take care of yourself. We’re talking about some basics, but even bugs you think might be too complicated to squash may be simple to deal with.
Bear in mind, that there may be cases where you need the help of technical support, and I’ll point those out if they apply. But otherwise, let’s look at what you can do on your own.
How to restart your iPhone
There are several instances where a simple restart might fix whatever issue you’re dealing with. You can restart the phone in different ways, so let’s go over them:
For the iPhone X, 11, 12, and 13 models, press and hold the power and (either) volume buttons until the power off indicator appears. For the iPhone SE or older models, just hold down the power button until you see it. When the device is off, leave it like that for at least 30 seconds before trying to turn it back on.
Then there’s what’s called a hard reset. This shuts down all apps, clears the cache, and resets the RAM, which may be enough to jog the device back into functioning properly. To do that, follow these instructions:
Press and release volume up
Press and release volume down
Keep holding the power button on the other side until the Apple logo appears onscreen.
For the iPhone SE or older models with a home button, repeat the first two steps, only holding the power button and home button down at the same time for step 3.
Don’t fret if it takes many seconds before the logo appears. This type of reset takes longer than the “soft reset” I described earlier. A hard reset won’t resolve every iPhone issue, but it’s worth a shot if you run into problems with lag, a frozen screen, battery life issues, or apps crashing all the time.
Checking on battery life
So, you’re noticing that battery life isn’t lasting the way it should. The first thing to do is double-check that your iPhone is running the latest version of iOS. To do that, go to Settings > General > Software Update. Sometimes, an iOS update will fix certain battery issues, but not always.
It might be an overactive app causing the battery drain, and one way to investigate that within Settings is to go to Battery. Here, you will see which apps are drawing the most power. Check to see if an app you rarely use stands out as a drainer. If there is, try deleting that app to see if it makes a difference. If the top of the list includes apps you regularly use, then make sure to go to the App Store and download the latest updates.
Another thing you can try is to go to Settings > General > Background App Refresh. When you turn it off for select apps, it means those apps won’t refresh with the latest data when you open them. It can be an annoying thing to do for apps you regularly use, but if you’ve discovered a rarer app causing battery issues—and you don’t want to delete it—try this method first.
As a safety valve, you can use Low Power Mode to conserve battery life, if necessary. Go to Settings > Battery > Low Power Mode and toggle it on. You can also set it as a shortcut on the Control Center when you swipe down from the top right of the screen. To do that, go to Settings > Control Center > Customize Controls and add Low Power Mode.
Battery health metrics
Within Settings and checking on battery health, you can go to Battery > Battery Health and check what the percentage is. The number indicates what capacity the battery has. Anything under 80% means you will likely have to replace the battery. The iPhone’s battery does lose capacity over time, so that is normal, but the more it drops, the more “unhealthy” the battery is. That’s why you may need to replace it, which is wise to do if you’re covered under warranty.
Find out why your iPhone is slowing down
You’re not sure how or why, but you notice that your iPhone is lagging or slowing down. What’s causing it? It could be several things, but here are some bases you can cover. First, you can check to see if storage is an issue. Is your iPhone running low on space? Go to Settings > General > iPhone Storage to be sure. If you have plenty of room, then you can move on. Here are a few steps to try:
Make sure you are running on the latest iOS version.
Update your apps, especially the ones you use most.
Delete the apps you don’t use at all.
You can also try to clear the phone’s cache. Start with Safari by going to Settings > Safari > Clear History and Website Data. Another option is to go to Advanced within the Safari menu in settings instead and choose Website Data > Remove All Website Data. This will clear the cache, yet maintain your browsing history.
Voice isn’t working well
This could be any number of issues, but let’s start with voices not sounding clear first. There is a cool feature that can improve voice quality when using data-driven apps for calls, like FaceTime, WhatsApp, Instagram, Signal, and Telegram, among others. When you’re on a call, swipe down the Control Center and tap Mic Mode. It will show as Standard, but if you switch it to Voice Isolation, those on the other side of the call won’t hear background noises. That means no traffic, screaming kids, barking dogs, or whatever else might be going on.
Note that this won’t work with regular calls through the Phone app, only those you do through the aforementioned platforms. You can also use Voice Isolation on a Zoom or Teams call, which is very cool. It won’t work for every app, though, so common ones, like TikTok and Snapchat, may not work with it.
It also only works with iOS 15 or later, so if you are running on an earlier version, that would explain why you may not see the feature available.
Earpiece or speakerphone issues
If you feel your problem is with the earpiece or speaker, you can try a few ways to find out. The basics are to see if the volume level is too low when you’re actually talking through the earpiece or speaker. Each of them has their volume levels, so it could be that.
Next, would be to isolate the problem. If you can hear them fine on speaker, but not through the earpiece—or vice versa—then you know it’s one or the other. Try using headphones or earbuds, be they wired or Bluetooth, to see if you and the other person come through clearly. If you do, then the issue is limited to the earpiece or speakerphone. In rare cases, it might even be both.
Hardware issues like that require replacement, so you would need to make arrangements to get that done. Taking these steps, however, helps technicians know exactly what to eliminate as a variable.
The screen isn’t responding
You tap on the screen but either nothing happens, or there’s a delay in response. Before you head out to get the screen fixed or replaced, let’s make sure it’s not a software issue. Try a restart or hard reset first to see if that takes care of it. While the phone is off, clean it with a screen cleaner in case something gets in the way on the surface.
If you are using a screen protector, you may need to take it off to confirm the issue persists anyway. After trying all that, an unresponsive screen would indicate a faulty display of some kind. Assuming your iPhone is in good shape, it’s not hard to replace the screen, and you may even try it yourself, or get it done with a trained technician.
Charging issues
Maybe you’ve come across an iPhone that doesn’t charge properly, or charge at all. To find out why, you can take a few steps to figure it out. If, by chance, your iPhone is too hot, you will see a message pop up on the screen saying so. This can happen if you leave the phone out too long in the sun, for example. Take it to a cooler spot and leave it until the phone moderates in temperature.
The easiest way to check and make sure the phone is charging properly is to try different cables. Sometimes, it is just the cable. Other times, it may be something about how the cable is connected to the phone. If nothing works, then it may be time to take it in for repair.
With wireless charging, you’re less likely to see any issues. But if the phone charges wirelessly, and doesn’t with a cable, then the battery should be fine, while the Lightning port may be the troublemaker. You could try carefully cleaning out the port a little by using a microfibre cloth or something soft to clear out some dust. If you have a compressed gas duster can, spray into the port (from a short distance) to see if that clears out any debris.
At Ukamart, we understand the frustrations that come with tech issues, and we’re here to help you find the best solutions. When you shop with us, you’re not just buying a product—you’re investing in quality, reliability, and exceptional customer service.
Don’t let tech troubles slow you down. Visit Ukamart today and explore our extensive range of high-quality laptops, phones, and accessories designed to keep you connected and productive. Experience the difference with Ukamart—where quality meets convenience.
If you have come across issues with your iPhone, leave a comment below. It’s always good to share information to fix any minor problems that come up while using the device. Check out the latest iPhones if you’re thinking of moving on to another model.
How to record a video of your smartphone screen : Your smartphone is already a camera, audio recorder and gaming device, but you can also use it to record whatever it is you’re doing onscreen.
Taking screenshots is easy enough on any phone, but screen recording used to often require a third-party app. Now, tools like that are often built-in, cutting down the number of steps to get there.
If you’re wondering why you’d even want to record your screen, there are several reasons. One could be to show a friend or family member how to do something on their phone, be it tech support or something interesting on a new app.
Another might be to include clips as part of videos you post on social media or video-sharing sites, like YouTube. Whether it’s to help demystify something for viewers, or part of something you’re reviewing, it’s a nifty way to pass on information. Or, you might be a mobile gamer, and this would be one way to share your own gameplay.
And it’s getting easier to do. Here’s how, for both iOS and Android.
Screen recording on your iPhone
Apple initially included its own built-in screen recording feature with iOS 11, and has maintained it since. You can find it by swiping down from the upper right-hand side of the screen to get to the Control Center. Look for the icon of a circle with a dot in the middle. If you don’t see it there, you may need to add it first.
Go to Settings>Control Center>Customize Controls, and you will see the option to add shortcuts to the Control Center menu. Tap the + icon next to Screen Recording and it will fall under the “Include” list. Swipe down from the top again and you should see the Screen Recording icon on your Control Center menu.
Every time you tap it, there’s a three-second countdown until the video recording actually starts. A red line at the top of the screen or a microphone icon will indicate recording is active until you tap it again to end it.
The finished clip immediately saves to your Camera Roll. Note that videos will record in portrait or landscape, depending on how you’re holding the phone. The accelerometer just works naturally, so you don’t have to select an orientation ahead of time.
Bear in mind, also, that the top-left corner (where the time shows) does appear in red in the recorded clip, and there’s no way to turn that off. If you want to get away from that, read on for the alternative method.
Screen recording on older iOS versions
If, for whatever reason, you’re using an older version of iOS, like with an old iPad, for example, you can still record your screen. You just have to do it a different way. You can go through this process if you want to get rid of the red strip at the top of the clip.
There is no shortage of third-party screen recording apps on the App Store, so browsing through some of those may be worth your while. I just haven’t tested any of them extensively, and can’t speak to any that might rise above the pack.
Perhaps a little more cumbersome, but you could also do this through a Mac. Unfortunately, it stopped working on Windows PCs after Apple cut off support for Quicktime on that operating system.
Plug in your iPhone and open Quicktime on your Mac (it’s pre-installed on your Mac).
Go to File and select New Movie Recording.
A window will pop up. Look for the arrow pointing down (next to the red record button).
Click that for a drop-down menu where you will select your iPhone.
You should now see your phone’s screen appear. If you want, you can also switch the microphone settings. Click the same arrow for the menu and look for the microphone options. Here, you will have the choice to record sound from your iPhone, your computer’s microphone or an external mic plugged into your computer.
This is great for whatever you’re looking to do. If you’re recording footage of a game or multimedia app and need the phone’s sound, you will get that. If you want to do a voiceover, you have that option, too, which is great for tutorials.
You can even choose between High or Maximum image quality. Totally up to you on what you prefer. The accelerometer will determine what orientation the video appears in. Hold your phone upright for portrait or sideways for landscape. If you’re going to lock the orientation, you will have to do it on the phone first.
When you’re done, hit the stop button on Quicktime, and that’s it. Save the file on your computer. To move it to your phone, use AirDrop on your Mac for the quickest transfer.
One last thing: you may notice that the time is always 9:41 A.M. Why? Because Apple always uses that time in its ads. In the past, Apple tried to time its biggest product unveiling at 40 minutes after a keynote started. It’s changed since then, but alas, the timestamp remains.
Screen recording on your Android phone
Using a Pixel phone
Google finally unlocked this feature for Pixel devices, making it super easy to use. You can find the built-in screen recorder by swiping down the notification pane twice to see the quick settings. Swipe left and you should see Screen record appear in the list.
If, for whatever reason, it’s not there, that’s an easy fix. Tap the edit icon (the pen symbol) and you will have the option to drag and drop whichever tiles you want into your existing list. That’s how you can add Screen record and place it wherever you prefer.
When you’re ready to start recording, a pop-up will appear with a toggle for audio. By default, it’s off, meaning it won’t record any audio at all. If you want it to record the sounds the screen makes, then toggle it on for Device audio. Music, calls, and ringtones will come through. This is great if you want to record a video call with a loved one, for instance.
But to make that even better, tap the downward arrow and select Device audio and microphone so that both the phone and any sounds the microphone picks up, like your voice, are recorded. This is not only great for calls, but also for walking someone through how to do something on the phone.
Using a Samsung Galaxy phone
Samsung’s latest smartphones have a built-in screen recorder you can use at will. Just swipe down the notification pane and swipe right to find it among the other icons. Samsung added this a few years ago, and it’s now a staple of its One UI overlay. Any Samsung device running One UI 2.0 or later will show you the screen recorder in the pane. You can also move the icon to a more convenient location in the quick settings under the notifications pane.
If you’re using something that doesn’t at least have One UI 2.0, then things get a little complicated. I would recommend using a third-party app to make it easier on yourself, in that case.
Using a Motorola phone
Motorola added this feature some time ago, and it works similarly to others. Drag down the notification pane until you see your list of quick settings. Look for Screen record and tap it. Or you can hold it to bring up a new menu letting you choose resolution, viewfinder size, recording time limit, and whether you want touch points to be visible.
Once you’ve started a recording, a strip appears on screen letting you also determine if you want any sound, or even add the selfie camera to film yourself as the screen records. This is great if you’re gaming and want to add yourself to the recorded footage. The Moto Gametime app has its own screen recording shortcut for just such a purpose.
Using a OnePlus phone
OnePlus added a native screen recorder starting with the OnePlus 7 Pro. Subsequent models also have the feature, and the company added it to the OnePlus 6 and 6T as well. To get it, all you need to do is swipe down from the top to get to the quick settings in the notification pane. Swipe left and you will see it on the second page of selections.
Using third-party Android apps
One option is to use a third-party app you can download from Google Play. Searching for a screen recording app will produce a laundry list of results. Which one is best? I personally have used AZ Screen Recorder, Mobizen and Vysor as among the best ones.
What I like about Mobizen, in particular, is that it is free to use, and presents you with options in how you want to record. They could include screen resolution, whether taps should be visible and if sound should be muted or not, among others. It also works on any Android device after version 5.0 Lollipop. There are even versions on the Play Store specific to the make of the phone.
Using your computer
Another alternative to know How to record a video of your smartphone screenis is to do it through a computer. This method applies to both Mac and PC.
You will need to download and install a program called AndroidTool, which is free. On your phone, go to Settings>About phone>Build number and tap it seven times. A pop-up message will show that “Developer Options” are now on. Go back out, tap Developer Options and slide USB Debugging to on.
After launching AndroidTool, plug in your phone to your computer and it should recognize it instantly. Note that devices running on Android 8.0 Oreo or later may not appear so easily. I’ll get to an alternative on that right after this.
With AndroidTool seeing your phone, you can go to AndroidTool>Preferences>Quality to move the sliders and do things like adjusting image quality. From there, you can just click the red recording button and start a video. When finished, click the stop button. Your finished clip will save to an AndroidTool folder on your computer.
Vysor will work with almost any version of Android, and is pretty robust. Not all features are free, mind you, but you can try it for free. You just have to pay to remove watermarks and get all the features.
An extra benefit in using Vysor is that you can also control your phone from your computer. It’s a cool way to type messages faster or just use apps on the phone while doing something else on a computer application. So there you have it, How to record a video of your smartphone screen.
Invest in the best tech with Ukamart, and make your screen recordings and all other digital tasks a breeze. Visit our website today and discover the difference quality makes!
Google’s latest smartphone, the more budget-friendly Pixel 6a, is now available, and here is what you can expect from the device.
Canada never got the previous Pixel 5a and only saw a limited release in the United States and Japan in 2021. Because of that, this phone is a bigger leap forward when compared to the Pixel 4a that came to the Great White North in 2020. As with all Pixel models with an ‘a’ affixed to them, the purpose is to offer great value for what you pay.
What the Pixel 6a can do
The Pixel 6a follows the same design language previously seen in the Pixel 6 and Pixel 6 Pro. That applies both on the outside and inside to varying degrees. It has a strip in the rear housing the dual camera setup, along with glass covering the rest of the panel. The 6.1-inch OLED display makes the phone a little smaller than the regular Pixel 6, though they share the same screen resolution. A newer fingerprint sensor aims to improve the inconsistent one from the other Pixel 6 devices, and from my initial experience so far, it is definitely better on this device.
It runs on the same Google Tensor processor the other Pixel 6 models do, including the Titan M2 security chip on top of that. It only comes in one variant, so regardless of the colour you go with, you get 128GB of internal storage and 6GB of RAM. Not to mention Wi-Fi 6E and 5G connectivity, as well as eSIM if you wanted to forego a physical card.
The 4400mAh battery is said to last over 24 hours, and charges via USB-C. No wireless charging here, unfortunately, and no wall charger in the box, either. Google still nicely includes a USB-A-to-USB-C adapter, something you don’t see often these days.
Camera specs and features
The 12.2-megapixel main camera in the rear is different from the other phones. Google also went with the same 12-megapixel ultrawide camera seen in the Pixel 6 Pro. An 8-megapixel front-facing camera rounds things out. No telephoto lens on the rear, nor an ultrawide on the front.
Google’s Tensor chip is the power behind features like Night Sight and Real Tone for the camera to keep results more consistent. You won’t get the motion modes (Action Pan and Long Exposure) available in the other Pixel models. What is cool is Magic Eraser works in Google Photos on the Pixel 6a, letting you remove something from an image. It also doesn’t matter if you captured the photo with the phone or not.
Other details
Unlike past Pixel ‘a’ phones, the Pixel 6a does have IP67 protection, so a dip in clearwater won’t ruin it. Gorilla Glass makes the glass tougher, but it’s not going to be able to completely avoid cracking or shattering the screen.
Google is promising three years of Android updates, plus five years’ worth of security updates. Feature Drops will come every few months to improve or add features to the phone as well. Hands-free access to Google Assistant is always there, as is Live Translate or the transcription features with the Recorder app, the latter of which works even when the phone has no Internet access.
There’s more, and we’ll be covering it in the full review coming up on the Best Buy Blog. The Pixel 6a is available now for pre-order and comes in charcoal, chalk, and sage.
Conclusion
]The Google Pixel 6a is ready to redefine your smartphone experience with its advanced features and user-friendly design. At Ukamart, we’re excited to bring you this cutting-edge device along with a host of accessories to complement it. Trust us for all your tech needs and enjoy the best in quality, service, and convenience.
Visit us at Ukamart and secure your Pixel 6a today!
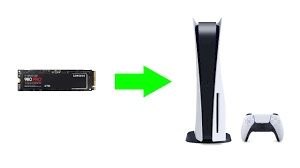
The PlayStation 5 is a marvel of modern gaming technology, but its built-in storage can fill up quickly with today’s massive game files. Fortunately,Sony has made it possible to expand your PS5’s storage using an M.2 SSD. This guide will walk you through the process of How to Expand Storage on Your PS5 with an M.2 SSD, ensuring you can continue to enjoy your favorite games without worrying about running out of space.
Why Expand Your PS5 Storage?
The PS5 comes with a custom 825GB SSD, but with the operating system and mandatory updates, the usable space is significantly less. Games like Call of Duty: Warzone and Cyberpunk 2077 can take up a huge chunk of your available storage. By adding an M.2 SSD, you can increase your storage capacity, allowing you to install more games and apps without needing to delete old ones.
What You’ll Need
Before you start the upgrade process, you’ll need to gather a few items:
A compatible M.2 SSD (Sony recommends one with a PCIe Gen4 x4 interface and a minimum capacity of 250GB)
A heatsink (to prevent the SSD from overheating)
A small Phillips head screwdriver
Choosing the Right M.2 SSD
Not all M.2 SSDs are created equal. For the PS5, you need one that meets the following specifications:
Popular choices that meet these requirements include the Samsung 980 Pro, WD Black SN850, and the Seagate FireCuda 530.
Installation Steps
Prepare Your Workspace: Make sure your PS5 is turned off and unplugged. Place it on a clean, flat surface with plenty of light.
Remove the PS5 Cover: Carefully slide off the PS5’s side cover. This might require a bit of force, but be gentle to avoid damaging any clips.
Locate the M.2 Slot: You’ll find the M.2 slot next to the cooling fan. Remove the screw holding the slot cover in place.
Install the SSD: Insert the M.2 SSD at an angle into the slot. Ensure it’s properly seated, then secure it with the screw provided. If your SSD has a heatsink, attach it according to the manufacturer’s instructions before installation.
Replace the Cover: Once the SSD is installed, replace the slot cover and secure it with the screw. Slide the PS5 cover back into place.
Format the SSD: Plug your PS5 back in and turn it on. The console will prompt you to format the new SSD. Follow the on-screen instructions to complete this process.
Post-Installation
After installing your new M.2 SSD, you can transfer games and apps from the internal storage to the SSD. This not only frees up space on your primary drive but also takes advantage of the high-speed performance of your new storage.
At Ukamart, we understand the importance of having reliable and high-performance accessories for your gaming and tech devices. Here’s why you should consider us for your next purchase:
Quality Products: We offer a wide range of high-quality laptops, phones, and accessories, including M.2 SSDs that are perfect for expanding your PS5 storage.
Expert Advice: Our knowledgeable staff can help you choose the best products for your needs, ensuring you get the right fit for your PS5.
Competitive Prices: We provide competitive pricing on all our products, so you can upgrade your tech without breaking the bank.
Customer Satisfaction: Your satisfaction is our top priority. We offer excellent customer service and support to ensure a smooth shopping experience.
With these Guidelines on How to Expand Storage on Your PS5 with an M.2 SSD, you can now upgrade your PS5 storage with confidence and enjoy uninterrupted gaming. Visit Ukamart today to explore our selection of M.2 SSDs and other top-quality tech accessories. Your next gaming adventure awaits!